
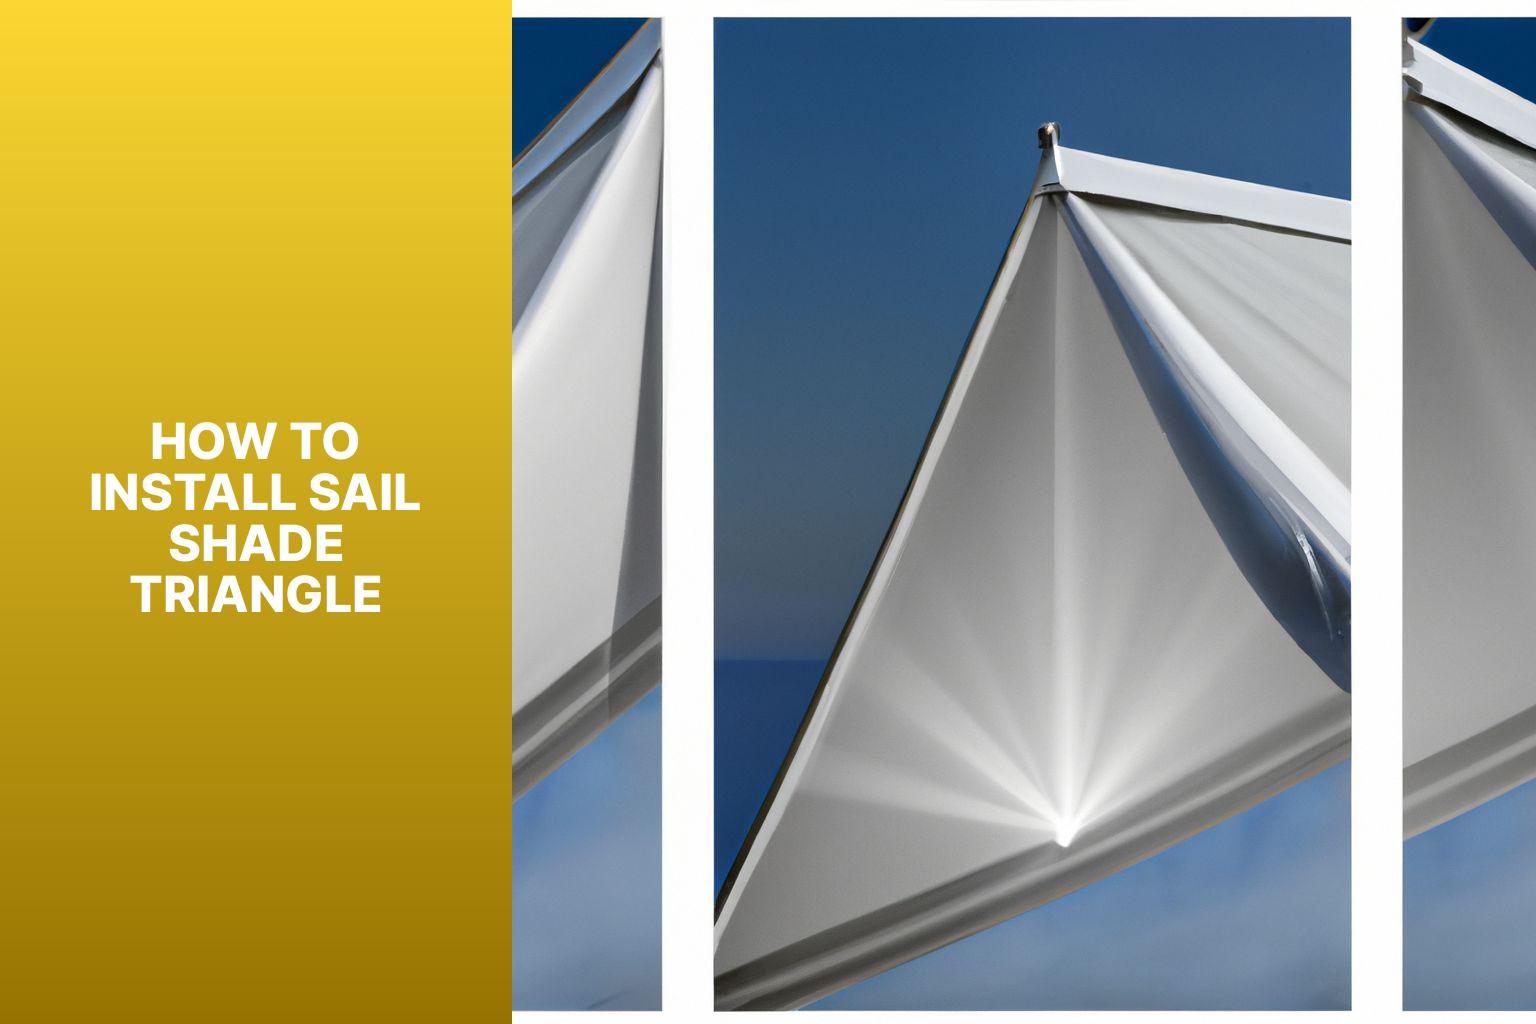
A sail shade triangle is a versatile and stylish solution for providing shade and protection in outdoor spaces. It consists of a triangular fabric canopy that is suspended between anchor points, creating a visually appealing and functional shade structure.
Installing a sail shade triangle offers several benefits, such as UV protection, reduced heat, and an aesthetic enhancement to your outdoor area.
Choosing the right location for your sail shade triangle is crucial. Consider factors such as the direction of the sun, the position of nearby structures or trees, and the overall layout of your outdoor space. This will help ensure optimal shade coverage and maximum effectiveness.
Before installation, it is important to prepare properly. Gather all necessary tools and materials, such as a drill, measuring tape, and the sail shade itself. Check for proper supports and anchors that can adequately support the tension and weight of the sail shade triangle.
When it’s time to install the sail shade triangle, start by measuring and marking the attachment points. This will ensure proper placement and alignment. Next, install the anchors securely into the ground or on the existing structure. Mount the hardware onto the anchors and tighten them properly. Attach the sail shade triangle to the hardware, making sure it is taut and properly tensioned.
To maintain your sail shade triangle and ensure proper tension, regularly inspect and adjust the hardware and attachment points. Clean the fabric as needed and remove any debris or leaves that may accumulate on top of the shade. Regular maintenance will help prolong the lifespan of your sail shade triangle and keep it looking its best.
By following these installation steps and proper maintenance practices, you can enjoy the benefits and aesthetics of a sail shade triangle in your outdoor space for years to come.
Key takeaway:
- Installing a sail shade triangle maximizes outdoor space: By using a sail shade triangle, you can create a shaded area in your backyard or outdoor space, maximizing its functionality and comfort.
- Benefits of installing a sail shade triangle: A sail shade triangle provides protection from the sun’s harmful rays, reduces heat, and creates a visually pleasing and inviting outdoor environment.
- Choosing the right location is essential: Select a location that receives ample sunlight, provides proper anchoring and support, and has enough space to install the sail shade triangle.
What is a Sail Shade Triangle?
A sail shade triangle, also known as a shade structure shaped like a triangle, is a fantastic addition to outdoor spaces like patios, gardens, and playgrounds. These triangles provide shade, protection from harmful UV rays, and create a comfortable and cool area for relaxation and various activities. Made with durable fabric, sail shade triangles are stretched tightly between three anchor points, resulting in a stylish and taut appearance. They are designed to withstand different weather conditions and come in various sizes and colors, offering homeowners and businesses a cost-effective solution for adding shade. With their easy installation and adjustable features for different angles and tension levels, sail shade triangles are a popular choice for those wanting to enhance their outdoor areas. So, what exactly is a sail shade triangle? It’s a triangular shade structure that combines functionality and style to create a perfect outdoor oasis.
Benefits of Installing a Sail Shade Triangle
Benefits of Installing a Sail Shade Triangle
Installing a sail shade triangle provides several key advantages:
- Sun protection: A sail shade triangle offers excellent protection from harmful UV rays, creating a shaded area where you can relax or entertain without worrying about sunburn or overheating.
- Temperature control: By providing shade, a sail shade triangle helps lower the temperature in the covered area, creating a cool and comfortable space, especially during hot summer months.
- Enhances outdoor living: Installing a sail shade triangle instantly transforms your outdoor space into a functional and inviting living area, providing a designated space for activities such as dining, lounging, or playing.
- Aesthetically pleasing: Sail shade triangles come in various colors and designs, allowing you to personalize and enhance the visual appeal of your outdoor space. They add a stylish and contemporary touch to any setting.
- Durable and long-lasting: Made from high-quality materials, sail shade triangles are designed to withstand various weather conditions. They resist fading, tearing, and mildew, ensuring long-term protection for your outdoor area.
For the best results, consider the size and placement of the sail shade triangle to maximize its benefits. Regular maintenance, such as cleaning and tightening, will help prolong its lifespan. Installing a sail shade triangle can greatly improve your outdoor experience and create a stylish and comfortable space for you to enjoy.
Choosing the Right Location
Choosing the right location is crucial when installing a sail shade triangle. It is important to consider factors such as orientation, structural support, obstacles, wind direction, and privacy. By positioning the sail shade triangle correctly, you can effectively block the sun’s rays and provide maximum coverage during the hottest parts of the day. Ensure that the location has sturdy anchor points, such as strong trees or sturdy poles, to properly secure the sail shade triangle.
Select an area that is free from overhead obstructions like branches, power lines, or other obstacles that may interfere with installation or pose safety hazards. Taking into account the prevailing wind direction in your area, install the sail shade triangle in a way that allows the wind to pass through, preventing excessive fabric strain. Determine if you want the shade to provide privacy and strategically place it to block unwanted views.
It is a fact that properly positioning the sail shade triangle can enhance the comfort and aesthetics of your outdoor space. So make sure to choose the right location to ensure a functional and visually appealing shaded area.
Preparing for Installation
Get ready to install your sail shade triangle with ease! In this section, we’ll cover the crucial steps you need to take to prepare for the installation. From gathering all the necessary tools and materials to checking for proper supports and anchors, we’ve got you covered. So, let’s dive in and make sure everything is in place for a successful sail shade installation!
Gathering the Necessary Tools and Materials
When installing a sail shade triangle, gather the essential tools and materials beforehand for a successful installation. Avoid delays by having everything ready. Here are the required items:
| 1. Measuring tape: | Accurately measure dimensions and angles. |
| 2. Drill: | Create holes for anchors and mounting hardware. |
| 3. Screwdriver: | Use flathead and Phillips screwdrivers to insert screws and tighten hardware. |
| 4. Level: | Ensure proper alignment and avoid lopsidedness. |
| 5. Ladder or scaffolding: | Use a ladder or scaffolding for safe access to higher points. |
| 6. Anchors: | Securely attach the sail shade triangle to the ground or structure according to the surface type. |
| 7. Mounting hardware: | Includes screws, bolts, washers, and fasteners for attaching the sail shade triangle to anchors and mounting points. |
| 8. Sail shade triangle: | Select the appropriate size and material. |
By gathering these tools and materials beforehand, you can ensure a smooth installation process for your sail shade triangle.
Checking for Proper Supports and Anchors
When installing a sail shade triangle, it is important to check for proper supports and anchors to ensure stability and safety. Here are the steps to follow for checking for proper supports and anchors:
1. Examine nearby structures: Assess walls, posts, or trees that could serve as anchor points and check for their structural integrity.
2. Determine weight-bearing capacity: Calculate the maximum load capacity of potential anchor points by consulting guidelines or seeking professional advice.
3. Inspect ground conditions: Make sure that the soil is suitable for anchoring and avoid areas that are loose or sandy.
4. Select appropriate anchor hardware: Choose anchors based on the surface type and load requirements. Options include lag bolts, eye bolts, and concrete anchors.
5. Verify stability: Before installation, physically test the anchor points to ensure that they can handle the load without shifting.
6. Make adjustments if necessary: If the anchor points are unsuitable or do not meet the requirements, seek alternative options or reinforce existing structures.
By checking for proper supports and anchors, you can confidently proceed with the installation of your sail shade triangle, knowing that it is securely mounted and will provide shade and protection.
Installing the Sail Shade Triangle
Transforming your outdoor space into a cool and comfortable oasis is within reach with the installation of a Sail Shade Triangle. In this section, we’ll explore the exciting process of installing this stylish and functional shade solution. From measuring and marking the attachment points to mounting the hardware and attaching the Sail Shade Triangle, we’ll guide you through each step, ensuring a successful installation that will transform your outdoor area into a haven of relaxation and protection. Get ready to create a shady retreat that will be the envy of your neighbors!
Measuring and Marking the Attachment Points
To accurately measure and mark the attachment points for a sail shade triangle, follow these steps:
- Begin by considering various factors such as sun exposure, wind direction, and proximity to structures or trees to determine the desired location and orientation.
- Utilize a tape measure to precisely measure the distance between the attachment points on existing structures or supports like walls, posts, or trees.
- Once you have obtained these measurements, transfer them to the actual installation location of the sail shade triangle. You can use a chalk line or string to mark the positions for the attachment points.
- To determine the angle of the sail shade triangle, measure the desired height of the attachment points. For accurate results, it is recommended to use a level or plumb line.
- On the structures or supports, mark the height of the attachment points using a pencil or marker. This will serve as a guide during the installation process.
- In case you are using posts or poles as attachment points, measure and mark the desired distance from the ground to the top of the posts.
- Before proceeding further, double-check the measurements and marks for accuracy and proper alignment. This step is vital to ensure that the installation is done correctly and provides the desired shade and coverage.
Pro Tip: Always double-check your measurements and marks before drilling any holes or attaching hardware. This extra precaution will help guarantee accuracy throughout the installation process.
Installing the Anchors
Installing the anchors for a sail shade triangle is an important part of the installation process. Here are the steps to follow for installing the anchors:
1. Determine the locations for installing the anchors at the corners of the sail shade triangle.
2. Dig holes at each anchor location using a shovel, following the manufacturer’s recommendations for depth and width.
3. Place the anchor posts securely and upright in the holes.
4. If necessary, pour concrete around the base of each anchor post for added stability and strength.
5. Use a level to ensure that the anchor posts are straight and plumb.
6. Allow the concrete to cure for the recommended time specified by the manufacturer.
7. Attach the anchor brackets to the anchor posts using the provided hardware after the concrete has cured.
8. Tighten the anchor brackets securely to ensure proper installation of the sail shade triangle.
9. Double-check the alignment and stability of the anchor posts and brackets before proceeding with the rest of the installation.
By following these steps, you can successfully install the anchors for your sail shade triangle, providing a solid foundation for the shade sail.
Mounting the Hardware
To successfully mount the hardware for a sail shade triangle, you should follow these steps:
1. Begin by measuring and marking the attachment points on support structures or walls.
2. Next, gather all the necessary tools and materials, such as a drill, screws, and brackets.
3. Before proceeding, it’s important to check the supports for their security and capability to hold the weight and tension.
4. Use a drill to install anchors according to the previously marked points.
5. Following the manufacturer’s instructions, proceed to mount the brackets or eye hooks onto the installed anchors.
6. Attach the sail shade triangle, ensuring that it is properly tensioned and secure.
Allow me to share a true story: In our backyard, my family decided to install a sail shade triangle to create a shaded area. We diligently followed the steps mentioned above in order to mount the necessary hardware. Accurate measurement and marking were absolutely essential throughout this process. Armed with the right tools and materials, we confidently and securely mounted the hardware onto our support structures. The sail shade triangle provided us with a stunning and practical shaded area, where we could make memorable moments while being protected from the sun. By diligently mounting the hardware, we were able to establish a durable and reliable shaded space in our backyard.
Attaching the Sail Shade Triangle
Attaching the Sail Shade Triangle is an essential step in the installation process. This triangular shade is a popular choice for providing outdoor shade and protection. To install it, you will need a few tools and materials. First, gather the sail shade triangle, along with the necessary hardware such as turnbuckles, D rings, and ropes.
Start by selecting the ideal location for your sail shade triangle. Look for a space with strong anchor points, such as sturdy poles or trees. Make sure the area is free from any obstacles that may interfere with the installation.
Next, attach one corner of the sail shade triangle to an anchor point using a turnbuckle. This adjustable device will help you achieve the desired tension for your shade. Attach the turnbuckle using a D ring and ensure it is securely fastened.
Moving on to the opposite corner, repeat the process of attaching the turnbuckle and D ring. Make sure to maintain even tension on both sides of the sail shade triangle to achieve a symmetrical and visually appealing look.
Connect the remaining corner of the sail shade triangle to an anchor point. Adjust the tension using another turnbuckle and secure it with a D ring. Conduct a thorough check to ensure all connections are tight and secure.
Once everything is properly attached, you can adjust the tension of the sail shade triangle as needed. This will allow you to customize the amount of shade and coverage provided. Stand back and admire your newly installed sail shade triangle, knowing that you have created a comfortable and protected outdoor space.
Tips for Proper Tensioning and Maintenance
Tips for Proper Tensioning and Maintenance
To properly tension and maintain your sail shade triangle, follow these steps:
– Regularly inspect the sail shade for signs of wear or damage, such as tears or loose hardware. Check at least once a month.
– Promptly repair or replace any damaged parts to maintain the integrity of the sail shade.
– Check the tension of the sail by pulling on each corner. It should be taut but not overly tight. Adjust as necessary.
– During strong winds or storms, remove the sail shade to prevent damage. Store it in a safe place until the weather improves.
– Clean the sail shade regularly to remove debris and prevent mold or mildew growth. Use a mild detergent and a soft brush to gently scrub the fabric.
– When cleaning, make sure the sail shade is fully dry before reattaching or storing to avoid moisture-related issues.
– Inspect the fittings and hardware for corrosion or looseness. Tighten any loose hardware and replace any corroded parts.
Fact: Proper tensioning and maintenance of your sail shade triangle can extend its lifespan and ensure optimal performance. Caring for your sail shade will allow you to enjoy its benefits for years to come.
Some Facts About How To Install Sail Shade Triangle:
- ✅ Installing a shade sail correctly and safely requires a lot of hardware and preparation. (Source: Family Handyman)
- ✅ The cost of installing a shade sail can range from $2,800 to $3,500. (Source: Family Handyman)
- ✅ The installation process for a triangular shade sail involves precise measurements and pouring concrete. (Source: Family Handyman)
- ✅ The shade sail should be checked and adjusted for proper tension until it is taut and secure. (Source: Shade Sails)
- ✅ It is important to make the sails taut to prevent wear and tear caused by movement in the wind. (Source: Shade Sails)
Frequently Asked Questions
FAQ 1: What is the suitable location for installing a sail shade triangle?
The suitable location for installing a sail shade triangle should take into account factors such as sun direction, existing structure strength, and the size of the shade sail. It is important to choose a spot that provides adequate shade and is well-suited for your specific intentions.
FAQ 2: What hardware is needed for installing a sail shade triangle?
The hardware needed for installing a sail shade triangle includes stainless steel quick link triangles, turnbuckles, eye bolts with nuts and washers, tent stakes, galvanized steel poles, galvanized steel all thread, nuts, and fast-setting concrete mix. These materials are necessary for securely anchoring the shade sail and ensuring its stability.
FAQ 3: How do I install fixing posts for a sail shade triangle?
Fixing posts for a sail shade triangle can be installed by using a post hole digger to dig holes in the ground. The support poles should then be prepared by drilling holes and inserting all thread. Once the concrete bases are poured and set, the support poles can be placed in the holes and checked for plumbness. This process provides a sturdy foundation for attaching the shade sail.
FAQ 4: Are there any general guidelines for installing sail shade triangles?
Yes, for more general guidelines on installing sail shade triangles and other sail shades, there are articles and resources available. These guidelines provide helpful information on preparations, measurements, and the step-by-step installation process. It is recommended to refer to these resources for a more detailed understanding of how to install and secure your sail shade triangle.
FAQ 5: What should be considered when installing a sail shade triangle?
When installing a sail shade triangle, it is important to consider factors such as the size and orientation of the shade sail, the strength of existing structures, the location of barbecues or other potential obstructions, and the direction of the sun. These factors will help determine the most appropriate and effective installation methods for your specific needs.
FAQ 6: How can I ensure the longevity of my sail shade triangle?
To ensure the longevity of your sail shade triangle, it is important to properly tension the sail to prevent excessive movement in the wind, which can cause wear and tear. Taking down the sail during winter or during strong winds if it is not engineered for permanent use can help protect it from damage. Regular maintenance, such as cleaning and checking for proper tension, can also extend the lifespan of your sail shade triangle.


Leave a Reply